RSS

Category Archives: WWII: Germans

Yet more early war Germans… or rather, the end of the line

Yet more early war Germans… or rather, the end of the line

This post has been a long time coming. I actually started it early summer last year, but then decided to finish it after the last three models. So,let us dive into what I finished this spring.

First of all there were some loose ends to tie up. That is opened topped vehicles I did almost three years ago, but that were still missing their crews. Having used a lot of Tamika kits that came with a crew, it seemed sensible to use these. (Sorry, just a group shot here.)

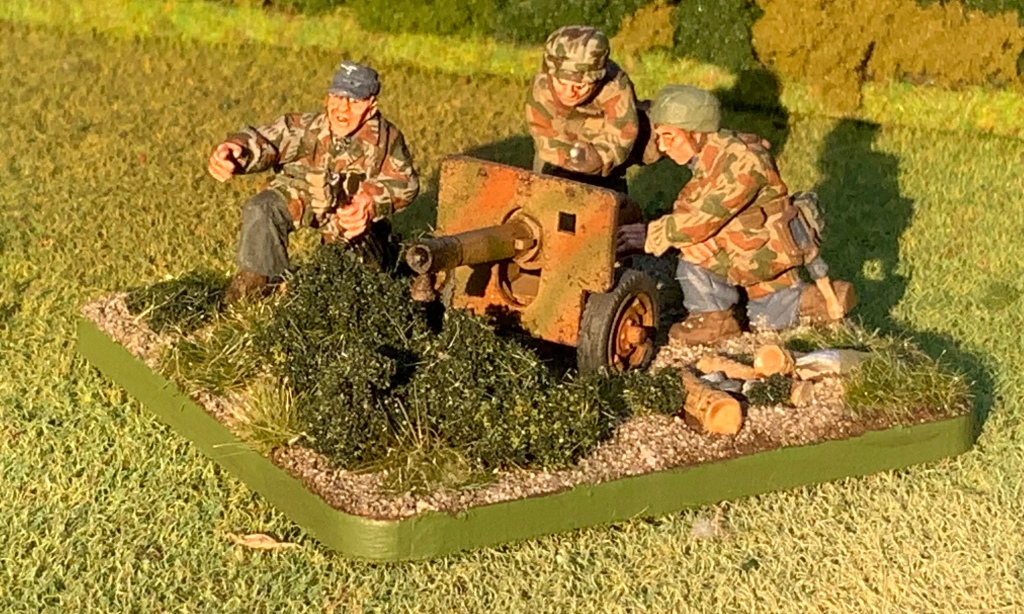
The good thing is, that there were so many, I actually had some extras to fill some more vehicles. One of them is a Krupp Protze KfZ 70 Tamika) to pull some guns like the LeiG 18 or PaK 38 below. Technically the LeiG 18 would have been pulled by a KfZ 69 and the PaK38 by something heavier. But I felt this was a good compromise for an army already overflowing with vehicle models. This way I could use the if (or when) an extra transport was needed as well.

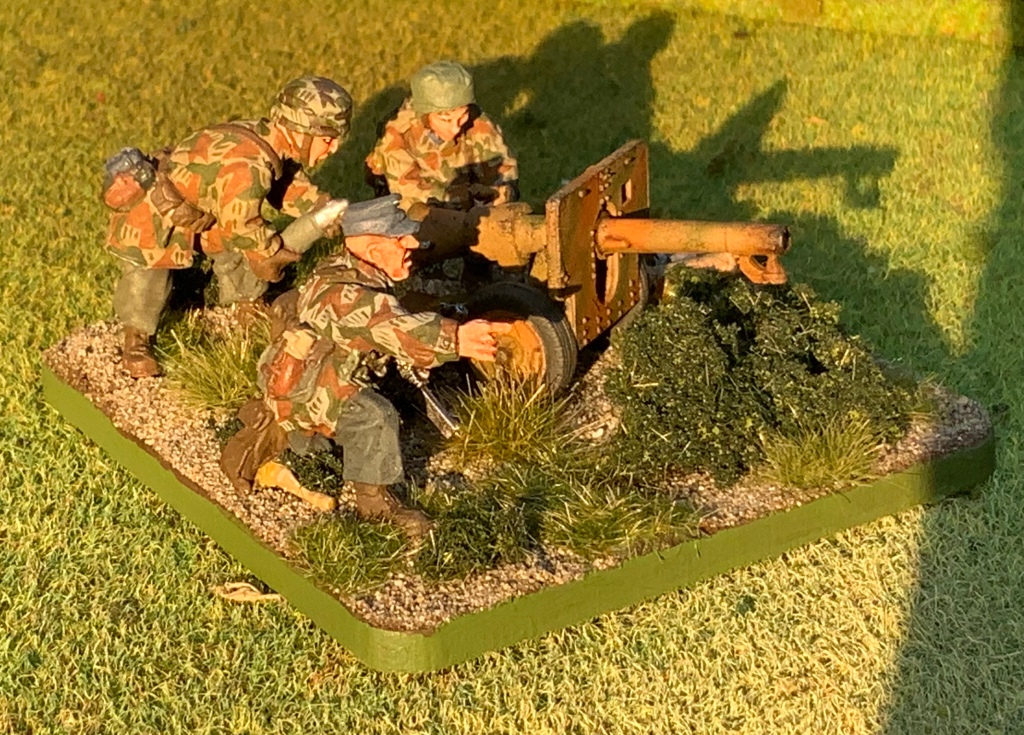
The LeiG 18 is actually a repaint of a model I did a couple of years ago. Back then I rather meant to use it mid war, which was represented by painting their uniforms this way and giving the grey a sun bleached look with a Dunkelgelb overspray. So I repainted them both to match my other early war stuff. One of the crew from the PaK 38 did not really match the gun IMHO so I gave that crewmember to the LeiG 18 and replaced the missing crewman on the PaK with a plastic one. Both of these guns are by Warlord Games, with the LeiG being an old now out of production version from their early days (or even the days before they bought the range from Paul Hicks).

The rest of the crew went to a SdKfz 251/3 and 251/18 (used as a regimental command vehicle) to give me more communications and command options. These are 3D printed models. I printed these out with my old FDM printer. Shame I did not print them out later. With my newer printer the lines would have been smaller.

Speaking for more command and communications options I also did a PzKw I command version (3D print), a SdKfz 263 and Opel Blitz communications van (both of the later are 1st Corps).

And while I was working on the SdKfz 263, I also did a SdKfz 232 to get a heavy armoured car. Both the model and commander are by Tamiya.

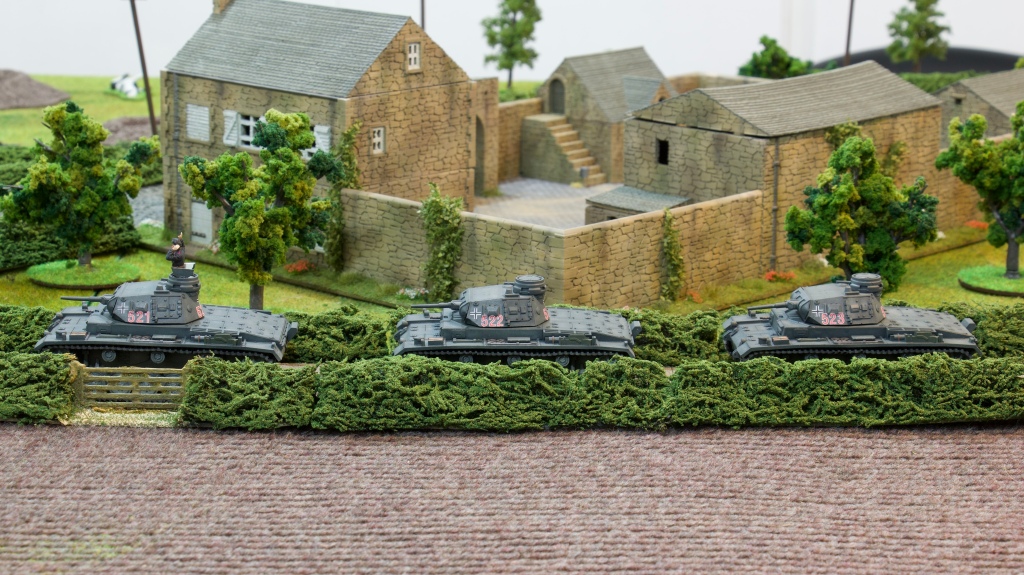
And to add some more armoured support for an infantry division I added three StuG III Ausführung B. These are Tamiya models as well. Stowage is scratchbuild using Tamiya parts and plastic are for the racks.

Now one of the last things missing was some armoured resupply vehicle. I opted for a SdKfz 252. Not the most common vehicle, but I always liked its shape over the SdKfz 250/6 it was replaced by. Again this is a 3D print and again I wish I had printed this later.

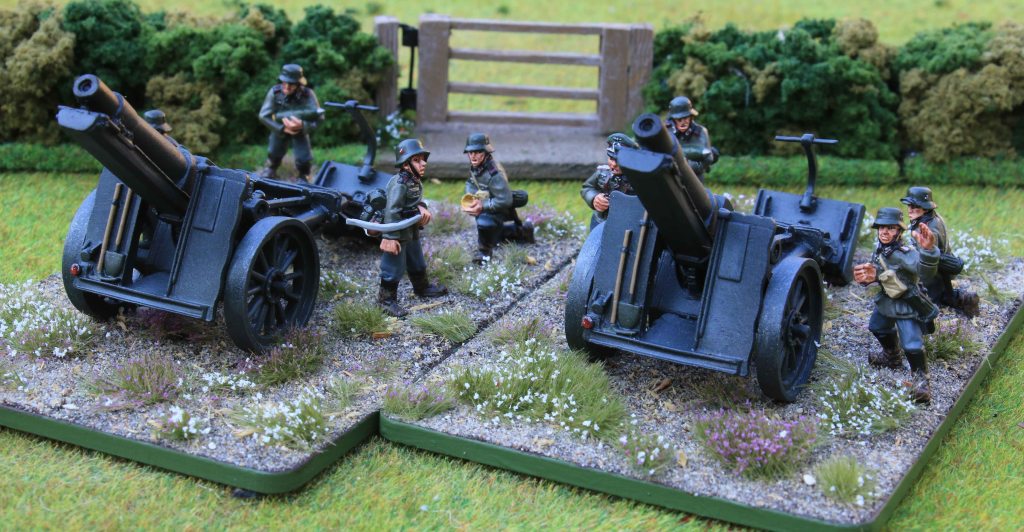
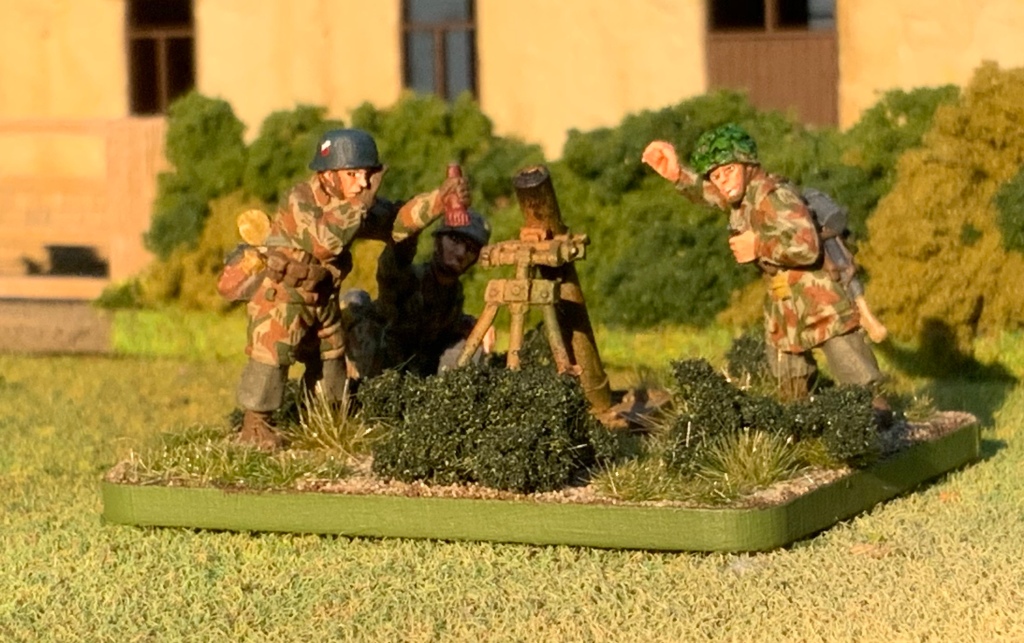
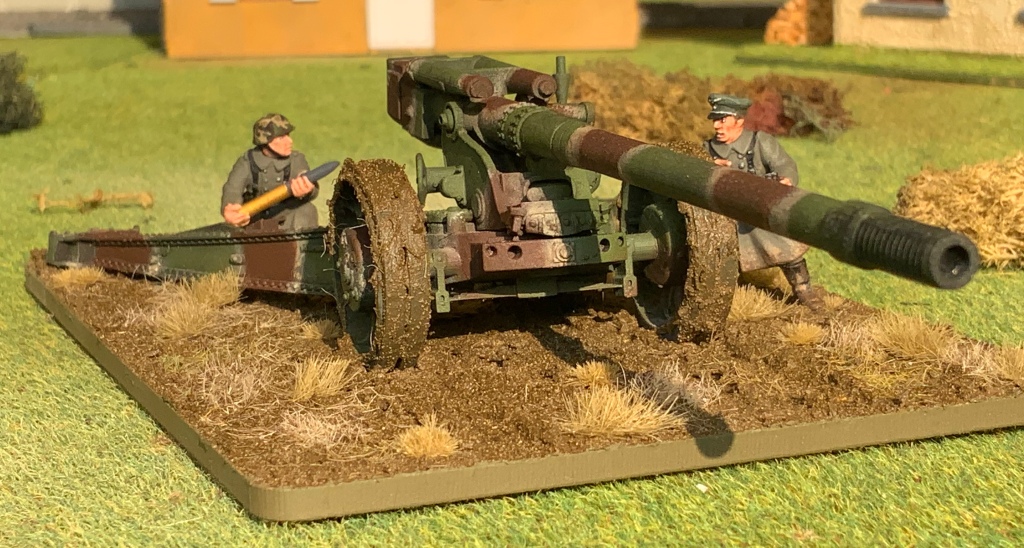
So far the only artillery I had was a pair of SiG 33. To round that off a little more and give me some more options I added a pair of leFH18 howitzers. Both the Warlord Games models.

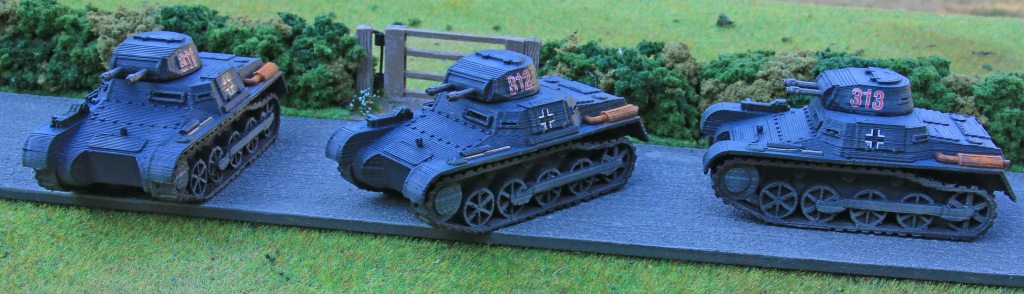
At this point my early war force was virtually complete. About the only things still missing were a Panzerjäger I, a Bison and another tank option when Imneed to depict a Panzer Division not equipped PzKw 38(t) tanks. Since the first two did not really interest me, that only left me with some PzKw III tanks.

I opted for a PzKw III Ausführung F. Maybe not the most common version, but I really like the twin turret mounted co-ax machine-guns. The models are by 1st Corps, the commander is by Rubicon.

And this essentially brought me to the end of the line. A complete force which can depict virtually any German force from the Invasion of Poland to Operation Barbarossa. Infantry in strength for all operations either on foot or mounted on trucks or half tracks, as well as a Kradschützenplatoon. All tank options from PzKw I to IV. Artillery, AT-guns, reconnaissance, command, communications vehicles and planes. Putting them all on the table for a group shot made me realise how much it actually is.

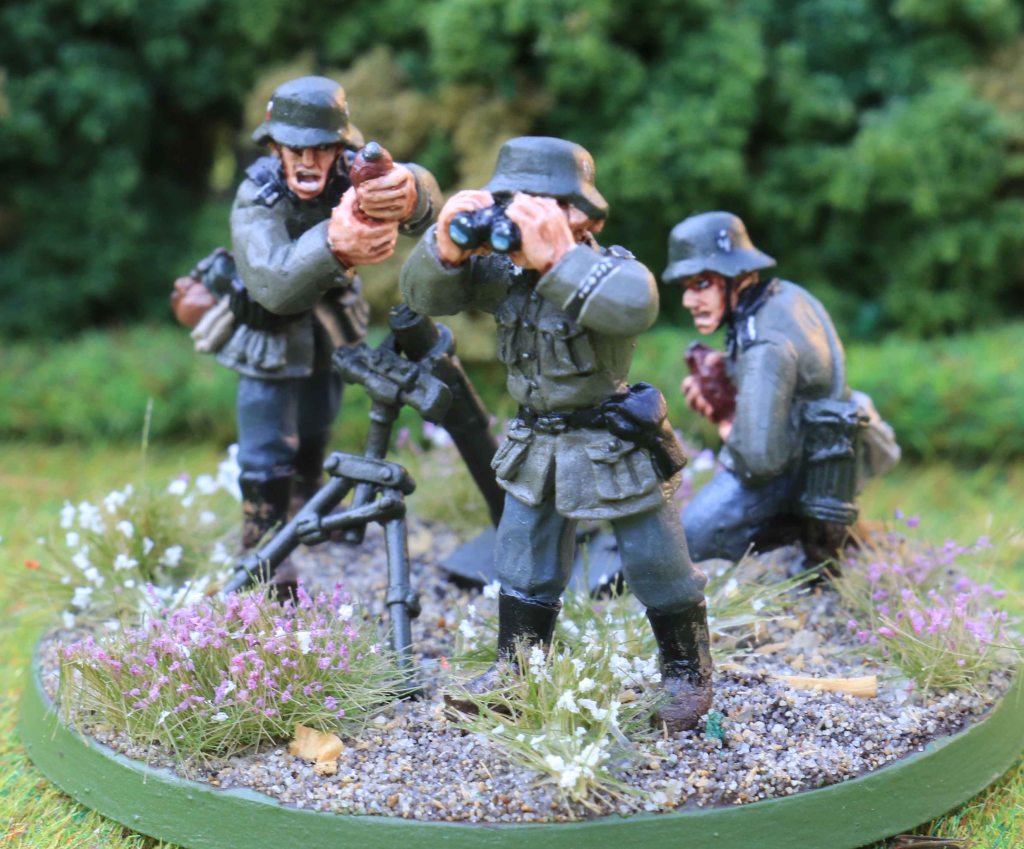
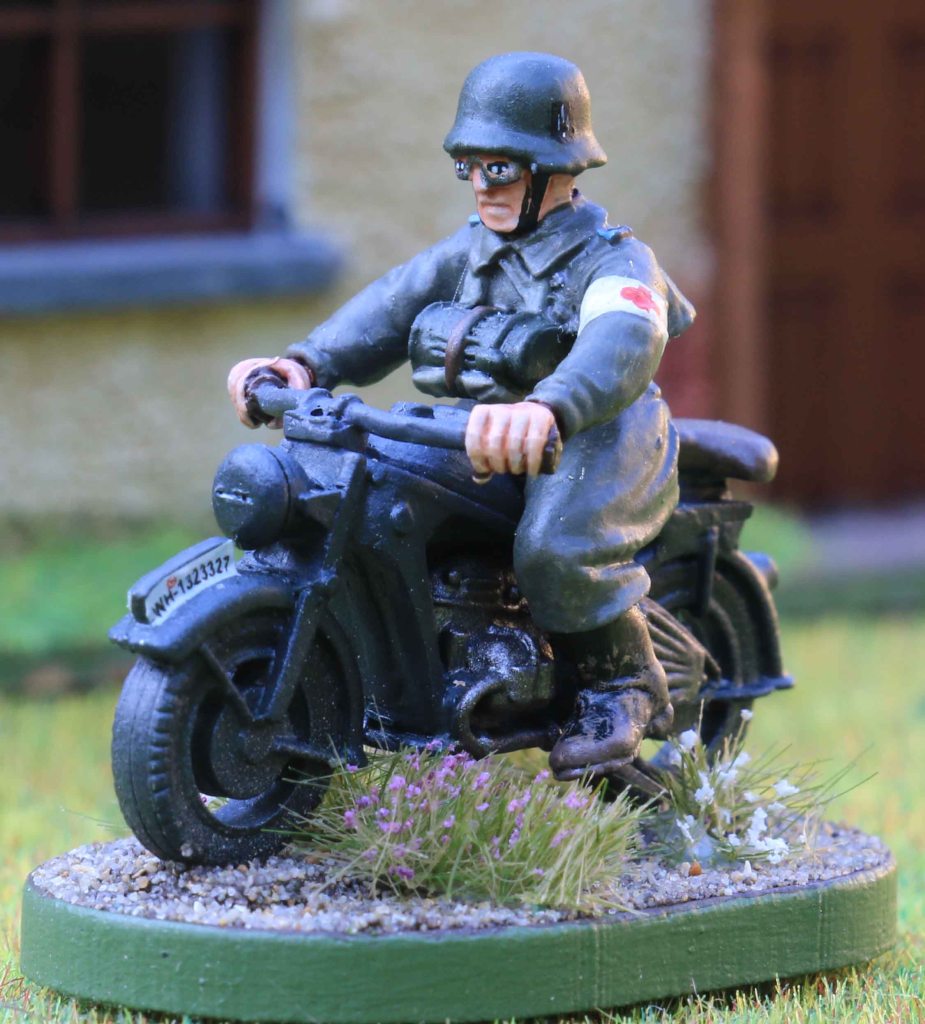
And last here are the detail shots from the past few years (from their respective posts):


I just wanted to do some rebasing…

I just wanted to do some rebasing…

… and went over the top. And build more. And repainted a lot.

Let’s start from the beginning. As the long time followers will know, we used to play WWII games using the „The Face Of Battle“ rules. Those were skirmish rules in the classic sense and worked really well with individualy based crews for crew served weapons.

Roughly a decade ago we switched to Battlegroup since we wanted something that catered for bigger games and was a little faster. Battlegroup does not really care much for the basing. So neither did I. But when I started adding some completely new forces in recent years (my 1939-41 Germans, late war Fallschirmjäger and Poles) I started basing crews served weapons and some small teams on multi bases. And I really liked the looks. So I made the decision to do everything new fitting that criteria this way and slowly rebase the old stuff. My Americans already got the treatment two years ago (man I could have bet that was last year), it was now time to start with my Germans.

Up first is a Bandai Pak40 in 1:48th scale. Which is a bit of an oddball in my collection these days. The roughly 50 year old Bandai kit is the only model kit on the market these days. You can also get a PaK40 in 1:48th from Blitzkrieg, but that is about it and then you you need to crew it.

About the only options for a seperate crew that some to my mind are Victory Force and 1st Corps. Which essentially means a very limited variety. So I decided to go with 1:56th guns (for those guns where I will essentially need multiples), mainly on account of Warlord games offering a choice for virtually any force and setting and secondly because I have some guns with crews from other manufacturers (Empress, Heer46 and Offensive Miniatures) for some of the more odd forces / settings like Gebirgsjäger, Volksgrenadiere, Charkiv and so on.

Why am I telling you this? Well since it is going to be my only PaK40 in this scale, I wanted to pick a setting that limits the chances that I will have to put two of them on the table at the same time. So I went for very late war SS. I already had a crew from Victory Force painted up in a mix of Pea Dot and plain uniforms ready so they would only require a repaint of the helmets to match them to the gun. But then I decided to repaint on the gun as well. Back then I used a green that was too dark and applied the camo with a brush. Unfortunately the paint had been a little thick, so the camo formed a slight raise on the model. I wanted to equalise this with a new coat of camo and some varnish. At least that was the plan. I decided to go for a Resedagrün base and apply a hard edged camo over it by airbrush. What I did not realise back then, was that the masking putty started to flow that day (it was the first heatwave here in Germany that day) which led to extremely raised edges. So essentially I had the same problem as before. I felt it was half as bad after two coats of varnish, but looking at the photos now… I think I will apply some heavy camouflage to the model. So you might see more photos of this one in the future. The crates and loose ammo are from the Rubicon offering below.

Up next is a PaK40 from Rubicon in 1:56th scale. My old system meant, that I could get a way with very few gun models by simply having different crews to place besides them. These days it means that I have more crews than guns. Like a Wehrmacht crew with a strong mid war vibe. Since this is a setting where I could imagine two PaK40 on the table I went with Rubicon here. (There will eventually be another gun from Warlord to add to it.) The gun is completely new, while the crew is one from Victory Force I painted ages ago. Most of the crew are converted from their tri-pod HMG set, only the gunner himself is from the dedicated PaK crew set. Again the helmets were repainted to match the gun, as were the ammo containers (which actually come from the Bandai gun above).

The next gun, a Pak43 is 1:48th scale again. Quite an expensive model from Gaso.Line. But worth it. I repainted the gun, but to be honest, I cannot really say why. I think it was because I did not like something about the camo pattern. The crew is from Victory Force once more. In retrospect I am not really sure about the gunner. While kneeling poses seem ok for the rest of the crew he is very much dwarfed by the gun, which makes him look strange. But Inwould imagine the crew operating the gun under fire, so he might try his best to keep a low profile. And it is a huge gun, which is why the German troops called it Scheunentor (= barn door). Which is also why I put it into a prepared position to break up its outline from the front.

Now the next one is completely new. A PaK97/38. Years ago I saw a painting by Giuseppe Rava and somehow it made me want to model that gun with a SS crew. The model itself is from Rubicon. The gun commander and loader are from the old Bilt Action rules (before they were sold to Warlord Games). I think they originally came with a PaK40, but I always loved them since they are so very dynamic. Since there is only two crew and the PaK97/38 requires a three men crew in Battlegroup, I build a gunner from the Warlord Games plastic SS set and I feel it turned out good. This also gave me a chance to try out a new recipe for Oak Leaf camo.

Speaking of trying out… I also bought some new paints for Italian camo that I wanted to give a try. Stössi’s Heroes have a nice set of Sturmmann Otto Funk & Grenadier Klaus Schuh, who served as a MG team in the scout section of the 12th SS in Normandy. The photos of them in Rots are amongst those most used from the fighting in Normandy. Now the minis depict them while the photo was taken and on that occasion they both wore overalls made from Italian camo fabric. The minis are actually really nice, but have two slight „defects“. For one they are a bit short. So glued another thin base onto the slots bases I use to make them about as tall as the other minis I use. The other is that the miniature of Funk is carrying post war NATO ammo boxes. So these had to be replaced with boxes from a Warlord plastic set and some filling with green stuff.

And last are the only minis that were (almost) just rebased. My Wehrmacht artillery spotter team. In a recent game the upper part of the Scherenfernrohr had broken of. When I repaired that, I had to remove the tripod and cut the parts where it broke flat. This lead to some damage to the paint and to make sure it was all uniform, I repainted the whole thing. The spotter and his radio operator where based together as well.


Battlegroup: Fall of the Reich, April 1944 Thuringia

Battlegroup: Fall of the Reich, April 1944 Thuringia

About two weeks ago, we finally played a big game at my place again.

I still have a lot of love for the late war period and I felt that Fall of the Reich would be a good change from all the early war and Pacific games we played at Martin’s place during those two years.

Table seen from the American side

I did not want the usual urban fighting or hoards of T-34s you often have with these games, so it was Americans fighting the Germans on the eastern front in Thuringia.

Table seen from the American side

The Americans would be a war weary bunch from an infantry division. A commander in a 76mm Sherman, a radio team, an artillery spotter for some off-board howitzers, a truck mounted platoon of infantry, a Sherman platoon (three 75mm versions and an Easy Eight), a M-10 Wolverine and a Greyhound.

Table seen from the German side

The Germans were led by a commander in a Panther l, radio van, dispatch rider, artillery spotter for two (on board) howitzers (banned by a few Fallschirmjäger cut off from their parent unit) by was a platoon of Panzergrenadiere on foot, a platoon of StuG IIIs, some bicycle mounted fusiliers. The big hitter was a PaK 44 (K81/2). I know these did not see action in that part of Germany, but I wanted to give it a spin.

Table seen from the Geman side

The mission was for the American to break the Germans by turn eight. Anything else would be a German victory. We had two objective markers. One close to each deployment zone. The Americans would start on the forested hill, while the Germans would set up in the village.

When rolling for starting forces the Germans were really lucky, getting everything on the table except for two infantry sections, one LMG team, all the StuGs and their supply truck. The infantry was spread out over the buildings and the orchard on their left flank. The large PaK was also deployed at the edge of the orchard with its flank covered by a building. The radio team and artillery hid behind builings, while the Panther, fusiliers, and a Panzerschreck team formed a mobile reserve inside the village.

The Americans were faced with almost the exact opposite. They hard to start with their scout forces (Greyhound and a sniper team) and only two additional units (the artillery spotter and one of the Sherman’s).

The Americans decided not to push their luck moving down the road covered by the PaK, but went down a fire break in the girrest instead. They came under some inconsequential artillery fire by the Germans. Both sides managed to secure their objectives on the first turn. Unfortunately the American player drew the Endkampf counter. With the Germans being forced to draw five counters they had lost about 45% of their Battlerating on turn one.

The second turn was mainly an artillery duel with the Americans pining the PaK and some of the supporting infantry while the German artillery took out the American spotter. Again the Yanks got lucky on their chit, drawing a breakdown counter, which they played on the Panther. Now the Germans were past the halfway mark when it came to their battleratind ad lost their only tank.

With a steady stream of reenforcements coming in for the Americans and the PaK being temporarily out of action, they pressed their attack. The American commander, now taking care of spotting, had problems getting in contact with their artillery which lead to a short lull in the fire. The German spotter had problems getting in contact with his artillery , inspire of the presence of the radio van, but the dispatch rider took care of that. But it seems, that the coordinates were already out of date, since the German artillery proved ineffective.

The Yanks kept on pressing forward along the road now. The PaK did its best to keep them at bay, but seemed unable to hit the broad side of a barn.

Only when on of the American trucks dropped infantry off in the field infront of the PaK did things heat up. They had missed the LMG hiding under the roof of the house next tonten field and had to pay a heavy price for that. Especially when the riflemen next to the gun joined in.

Between their fire almost a complete fireteam perished, while the other and a .30cal team got pinned. While one fire team managed to mount an ineffective attack later on, the rest of the game would see them pinned and slowly worn down under the crossfire.

Now the Americans would try to press into the town with their tanks. But the advance was piecemeal, due tongue drawn out arrived of troops on the table and the fact that both the force and tank platoon commander had to call in the artillery.


Late War Fallschirmjäger army

Late War Fallschirmjäger army

Even by the standards of this blog, my output seems to have been low for some months now. Well it is not that. As some might know, last year I decided to tackle an old project of mine. A mid to late war Fallschirmjäger army for the eastern and western fronts (Italy will see a seperate one). So I started of with some artillery and a PaK 40 as well as some support weapons, mortars.

Around New Years I began the project in earnest with everything you will in this post. As I said this had been a long time coming, since with the exception of 15 minis all of these had been cleaned and primed 15+ years ago. So it was long overdue to get them table ready.

Before anyone asks, with the exception of a few minis I will point out, all of these are by Victory Force Miniatures. Which might seem like a problem, since their range is only about a maximum of 20 different models strong. But as I said these are meant I represent a 1943 or 1944 and later force. By that time many units had seen a huge influx of new recruits trained and equipped at different times. So while some men still had old one colour Knochensäcke and helmet covers, others had Splittermuster (which came in distinctly different shades depending an manufacturer and batch) or Sumpftarnmuster. So that allowed for a lot of variety. Some went for painted metal items (helmets, canteen cups,…), trousers and ammo bandoliers. All in all these led to a very colourful force and I am happy to say… there are no two minis that share the same pose and colour scheme.

For the time being, these are based in the Fallschirmjäger list from Battlegroup Overlord, which will also work for the eastern front or later periods like Market Garden. If other lists for that period get published in later books, I will mostly likely tweak this force.

So up first is the battlegroup HQ.

Fallschirmjäger Battlegroup HQ

Up next are the spotters for all that artillery they have. The officer with the Scherenfernrohr is by Offensive Miniatures, the soldier with the map is from Warlord Games

Fallschirmjäger artillery spotter team

To make sure that these guys can actually reach the artillery, there is also a radio team (standing in for a wire team under the rules).

Fallschirmjäger radio team

The prone sniper is a converted Heer sniper by VFM, the sniper / spotter team is from Warlords plastic range (although I think I needed to convert the rifle to be scoped).

Fallschirmjäger snipers

There are two scout foot patrols. I rather like them, since they pack quite some punch with their FG-42s. As some will notice, the second team comes with G43s, but those will serve as stand-ins for the FG-42s.

Fallschirmjäger foot scout patrol

On to the infantry platoon HQ.

Fallschirmjäger infantry platoon HQ

Plus those platoon support options not done last year. Writing this, it dawned on me, that I am still missing the medic for this force. So I think there will be one more mini to paint.

Fallschirmjäger MG-42 HMG team
Fallschirmjäger Panzerschreck team

Now all three Trupps, with the exception of one NCO and one LMG assistant, feature the same minis. But as I said above, I think the variation in clothing / equipment colours and a few head swaps really makes them all look different.

1st Fallschirmjäger Trupp
2nd Fallschirmjäger Trupp
3rd Fallschirmjäger Trupp

The rules give the option to swap one of the regular riflemen for a secong LMG or two equip up tomtwommen with Panzerfäuste. So I build those options as well. All these are Warlord plastics (with the exception of the first and forth from the right with a Panzerfaust).

Fallschirmjäger LMG options
Fallschirmjäger Panzerfaust options

So what is left now. Well some anti aircraft and heavy anti-tank firepower.

For the anti-aircraft option I went for a 2cm FlaK 38. Essentially I see this as a light force and felt that a manhandled single barrel FlaK made more sense than a Flakvierling.

The model is a 1:48th scale plastic kit and the crew are converted Warlord plastics. I felt that since the kit gave me the option to depict the gun in any state I wanted, it would be nice to show it in the process of being limbered up, hanging half in the air.

Fallschirmjäger FlaK 38

And for the heavy anti-tank option I went for an Acht-Achter. I felt this was needed, since the Fallschirmjägerlist gives them StuG III or PzKw IV support at most.

The model itself is an old 1:48th scale FlaK 18 by Bandai that I have had for ages. I felt it would fit this force well, so it received some weathering and was given a Warlord plastics crew.

Fallschirmjäger FlaK 18

So this is it. All in all 96 minis, most of them in camouflage clothing. While I really, really like the result, I am really fed up painting Splittermuster and Sumpftarnmuster, especially all the „raindrops“. So I guess it will be at least 2023 before I start on the Volksgrenadiere (or so I say today).

Full Fallschirmjäger force
 

German vehicles for World War II

German vehicles for World War II

Now this post is something old, something new.

To put everything into context, I have been wargaming World War II for about two decades ago. Back when I started there was not too much around. The big names were Black Tree and Artizan. My choice of miniatures, namely Victory Force Miniatures, was exotic, especially when living in Europe.

Bolt Action (not the game, but the company that would later be sold on to Warlord to form the nucleus for the game of said name) was still a twinkle in Paul Hicks eyes. Due to that vehicles were far and few in between.

You had the choice between a few small ranges from the US and Canada and the old Bandai kits in 1:48th scale. I went for the later, partly due to the fact that I was able to acquire a largish batch of both assembled (in various stages of disrepair) and unassailabled state.

Not that the choices for paints were much better. Tamiya and Vallejo both had ranges far below the size the are today and AK and Ammo were not even in existence. Same went for colour guides.

So why am I rambling like this. Well to underline that some of my choices when it came to painting things were a bit… let’s just say experimental. Some were good or OK even by today’s standards (like you will see later on), others were completely out of the park (like the one that led to the repaint of all my American tanks two years ago).

But with those that were fine… well weathering back then was usually a fine mist of dust airbrushed on around the tracks. No longer up to the standards I use today. Obviously this means a distinct visual difference between the new and the old. So those old models that will not require a complete makeover, will be brought up to date as time goes on. The plan right now is to do a few every time I work on new vehicles.

The ones I decided to start off with are the workhorses of the German armies, the Panzerkampfwagen IV. In this case the H version.

Just to give you an idea what they looked like before, here is a couple of pictures pulled from the archives:

[photo had to be edited to comply with German law]
PzKW IV
PzKw IV

So what do they look like now? Let’s start with turret number 311, or as it is called now… turret number 126.

PzKw IV H

As you can (hopefully) see I added chipping to the edges, scratches to the Schürzen (they often scratched against the vegetation or buildings, leading to them being ripped off or scratched), rust streaks, a wash to give it all more definition and a filter to blend the colours in a more natural way. Now all of these were applied to the other tanks (old and new) as well, so I will not repeat myself there.

So why the new turret number? To make sure the decals would not detach when working with the washes and filters, I gave all the decals two coats of varnish a couple of days before I started. I might have done so back when I originally painted these, but since I could not remember anymore, I felt better safe than sorry. And it worked on all the other tanks, but not this one. With the decals rubbing off I also had some more freedom here. The paint job (field applied Hinterhalttarnung variation) is distinctly late war (fall / winter 1944 or later), but the old turret number were more mid war. So I went full later war with white outline stencilled numbers.

PzKw IV H

Turret number 713 aka „Styx“ also has more of a late war vibe to it. Around 20 years ago I saw newsreel footage of a StuG III somewhere on the Eastern Front taken sometime during the last two or three months of the war. It featured broad brown roughly vertical bands with green lines snaking around them on the skirts. I found that camo impressive, especially since the green lines would „hide“ behind the brown on every second crossing, giving that camo forced perspective. So I decided to use it on a PzKw IV.

PzKw IV H

I will probably change the tank commander miniature later on though. While a black uniform would not be out of the question late war, the Schiffchen does not feel right.

PzKw IV H

Turret number 304 has more of a mid-1944 feel to it. So I felt this would be the perfect one to add “some” foilage against allied fighter bombers. I decided against that for the two above. After all those are for the late fall 1944 onwards period, when tanks featured no leafie braches any more (you do not find those during the cold months).

PzKw IV H
PzKw IV H
PzKw IV H

Only half of the PzKw IV were painted with rust on the exhausts. Since these would usually rust fast in real life, I wanted them all this way. And since I wanted a uniform look on all of them, I simply redid them all.

PzKw IV H

Turret number 313 had features a camo of diagonal stripes often seen during 1944 and would have been a fine candidate for foilage as well. But back then it took me a whole evening to cut the skirts to turn them into field workshop chicken wire Schürzen and I did not want foilage to distract from them.

PzKw IV H
PzKw IV H

Rounding off the PzKw IV family is a Flakpanzer Wirbelwind.

This is a New Millennium Toys model that were available for cheap in the US for a short time nearly two decades ago. The paint job was absolutely horrible and so I redid that ages ago. It received the same treatment as the others. It is still awaiting its crew. I still have a crew from Eurekas Jurassic Reich range that fits it well. But right now it’s whereabouts on the lead mountain are unknown, so until I find them, it will remain uncrewed.

Flakpanzer Wirbelwind

Some of the details on the model are weak (or utterly wrong), but one can hardly complain for a model that cost less than 10 US$ back then.

Flakpanzer Wirbelwind

And ending the old ones is a Raupenschlepper Ost or short RSO.

I painted this one ago based on a photo of one in a museum (most likely not an original paint job, but I liked it. Last year I decided to use it as the tow for my Fallschirmjäger PaK 40, which got a matching paint job last year.

RSO
RSO
RSO with PaK 40

Kicking off the new is a Styer 1500a radio truck. I absolutely love the Styer for its rounded chassis and when I saw a conversion kit for the 1:48th scale Tamiya kit it was a must have for me. The rack for the fuel canisters on the roof is scratch build.

Styer 1500a radio truck

This one will serve as the radio truck for my late war Fallschirmjäger force, so this was a good time to paint it. The keen eyed amongst you will notice, that it sports Heer and not Luftwaffe number plates. Well in the end it will also serve as the radio truck for other rosters, so I went with those plates that fit most of my forces.

Styer 1500a radio truck

Personally I think the sky reflecting in the windows will need towing down… what do you think?

Styer 1500a radio truck

And rounding things off is a StuG III to complete a unit started three years ago. It felt like a good time, since they will be required to provide some armoured support to my Fallschirmjäger when needed.

Unfortunately it turned out a little darker than the old ones. I am sure I used the same shade of Dunkelgelb as I did back then. So I can only assume I used a different wash or filter. But to be honest… a lot of vehicles even within the same platoon usuall looked quite different. This is due to the fact that most vehicles were camouflaged by their recipients and that the paints came as pastes that needed to be mixed with liquids before application. They could be mixed with virtually anything (water, fuel, fuel oil, all kinds of oils and spirits) and applied by any means (airbrushed, brushed on, rubbed on with paper, rags, bare hands,…) which led to vastly different shades. So I can live with it.

StuG III G

Looking at the photos I realised, that the radio truck and StuG are both missing some dust. This shall be rectified when I next break out my airbrush.

StuG III G

This is it for today. For all of you who noticed all the Fallschirmjäger references… stay tuned for the next post, which will be a massive one!

 
Leave a comment

Posted by on July 1, 2021 in Battlegroup, Rules, WWII, WWII: Germans


German bicycle troops

German bicycle troops

There are two periods of WWII that I really like to replay. One is the very early period (1939 to 1941) and the end (1944 to 1945). The last few months are especially interesting, due to all the odd units and vehicles one can field. One of those odd units are bicycle squads.

Battlegroup Fall of the Reich has them in the form of Hitler Jugend tank hunter squads. Unfortunately there are no minis for that in 28mm, but Offensive Miniatures has some regular Heer / Volksgrenadier minis on bicycles. So these will simply serve as stand-ins.

The minis are nice sculpts, but I have to admit, they are also a bit fiddly. No more than any bicycle troops from any manufacturer I have seen, so I could live with it. The equipment and Uniforms are very varried (not quality wise but regarding to the equipment they represent), which really conveys that late war feel.

I used a lot of different shades of Feldgrau to underline the precarious late war supply situation. For the same reason, the bikes were painted different shades of Dunkelgelb and Grey as well as civilian colours to represent requisitioned bikes.

All in all they should make a very nice colourful late war unit. Really looking forward to fielding them, once COVID allows for regular games.


More Fallschirmjäger support weapons

More Fallschirmjäger support weapons

Before we left for Scotland in September I wanted to start on something small, that could possibly be finished fast after our return.

It turned out I actually managed to finish them, including the basing, in under four days (including two days on the day job). Not actually sure how, since Splittermuster camo is not exactly a fast subject.

Up first is the 8,8cm Racketenwerfer 43 Püppchen rocket launcher. The launcher, as well as the loader and gunner are from Westwind. Not sure if it is still the same, but back when I bought it the minis came with those terrible cartoonish heads. So those were replaced with Fallschirmjäger heads from Westwind.

Fallschirmjäger 8,8cm Racketenwerfer 43 Püppchen

Now when I had finished the Team, I felt it looked extremely bare on the base and if I remember correctly the Püppchen team is three men in Battlegroup Overlord. So I added a NCO from Victory Force Miniatures. Usually I would say that VFM look too large next to Warlord, but with the head swap on the other minis, they blend quite well.

Fallschirmjäger 8,8cm Racketenwerfer 43 Püppchen

Up next is the 2,8cm schwere Panzerbüchse 41. Unfortunately there is no official slot for them in Battlegroup Overlord, but I always loved the looks of this gun, so I could not do without it. And since there are stats for the Panzerbüchse itself, one can always come up with a price for the team.

Fallschirmjäger 2,8cm schwere Panzerbüchse 41

As with the Püppchen, this one is a Warlord set and again, I replaced the heads with Westwind ones.

Fallschirmjäger 2,8cm schwere Panzerbüchse 41

Up last are two 8cm Granatwerfer 34 mortars. Again these are by Warlord. In this case they even retained their heads. The faces are not cartoonish and some have their hands moulded to their heads, so it would have been a lot of effort to remove them anyway. But I replaced the mortars with mortars from Victory Force, which I still had lying around from a few conversions I did ages ago. The Warlord ones looked too tiny for my taste.

Fallschirmjäger 8cm Granatwerfer 34 mortars
Fallschirmjäger 8cm Granatwerfer 34 mortar

This is it for today. Looking at these photos though, I think I will have to put more effort into my photos again in the future. These were taken on my iPad, as I have done for months now. I think I need to switch back to my DSLR.


Two 12,8cm PaK 44

Two 12,8cm PaK 44

Turns out Corona did not have the effect on my blogging habits that I expected. While I did indeed play less in recent months, I did not blog as much either. But this was mostly due to most of the projects being bigger and taking more time.

One of the first one projects I tackled were two 12,8cm Pak 44s. The models themselves are 3D sculpts by the very talented Richard Humble printed in resin in 1:48th scale. (Anyone interested in these… the models are now being sold in 1:56th scale by Rubicon.)

Since these came without crew miniatures, I had to build some myself. I used plastic minis from different Warlord Games sets for them. These lend themselves quite well for these kinds of conversions.

12,8cm PaK 44 Kanone 81/2

Up first is the 12,8cm PaK 44 Kanone 81/2. This one actually saw action very late in the war. I wanted it to be manned by a Wehrmacht crew and to give them a look reminiscent of the last winter / spring of the war. So they are all wearing greatcoats.

12,8cm PaK 44 Kanone 81/2

The painting is also meant to represent this period of the war, with a Resedagrün base and Dunkelgelb and Schokoladenbraun camouflage. The camouflage was intentionally airbrush with a little too much pressure leading the feathering, to make it look like a fast and sloppy paint job.

12,8cm PaK 44 Kanone 81/2

The ground is meant to match with very muddy ground and dried out winter grass.

12,8cm PaK 44 Kanone 81/2

The other gun is the Rheinmetal version of the 12,8 cm PaK 44. Now while a few prototypes of this one were build, they never saw action (as far as I know), but it simply looks cool.

Rheinmetal 12,8cm PaK 44

For this one I chose an SS crew. Again going for a late war look they are wearing a mixed assortment of clothing. Greatcoat, regular uniforms (both in Feldgrau and Erbsenmuster), smock and Zeltbahn.

Rheinmetal 12,8cm PaK 44

The paint ob is quite simple. Just red primer for the gun and Dunkelgrau for the barrel. From what I have read, barrels were often primed grey, even till the end of the war, due to the grey paint being more resistant to the heat of the gun.

Rheinmetal 12,8cm PaK 44

The paint job got some streaking grime and rain marks to show that the gun was exposed to the elements. There is a tarpaulin hanging over the barrels to break up the guns silhouette. The tarpaulin was born out of necessity. When I had just assembled the gun, Sami accidentally swept the model off the table with his tail, breaking the gun. After I glued it back together , the barrel had a slight bend. Not much, but it was slightly noticeable where the barrels broke. But the tarpaulin is masking that quite well.

Rheinmetal 12,8cm PaK 44)

For the base I went with an urban look. This way it could the urban fighting seen a lot during the last few months of the war.

Rheinmetal 12,8cm PaK 44

That is it for today, but since we are off on holidays, I will have more time posting in coming days. So there is more to come.


Fallschirmjäger Heavy weapons

Fallschirmjäger Heavy weapons

The last few years have always been taken up by some big project that I wanted to paint in time for Crisis in Antwerp. As I said before, for the 80th anniversaries of WWII we want to do a game each commemorating a battle or campaign that took place 80 years earlier. So the last few years it was mostly early Germans and Poles for me. Now the Germans are done and two of my mates already have French so this year I am free to do whatever pleases me.

My project for this year is going to be mid to late war Fallschirmjäger. I decided to start of with the first batch of heavy weapons.

Up first is a PaK 40 from Warlord Games. I kept the paint job on the gun itself simple, with just a Sandgelb base and some green overspray on the lower half to mimic tall grass. I had seen a similar scheme on on a photo of a RSO in some museum and liked it. I actually painted a RSO like that and wanted the two to form a team.

Warlord Games PaK 40

Next is the artillery support. First a pair of LeFH 18. I found no manufacturer that does any with Fallschirmjäger crews in 28mm, so I created my own. The guns are from Warlord. I wanted them to look like horsedrawn guns. The original models came with the wheels for mechanised units. Since there were two types of wheels used for horsedrawn units (cast steel and wooden spiked wheels) I went for wooden wheels using some 1:48th scale wheels from Tamiya I still had at home. These make the guns sit a little higher than they should, but I actually like that look. The crews are mostly converted Warlord plastics, with the NCO from their metal range.

Warlord Games Fallschirmjäger LeFH 18

And last are two Nebelwerfer. These models are from Offensive Miniatures. Really liked these, since they came with lots of little items (ammo boxes and ammo) which allowed me to create two different scenes on the bases with little effort.

Offensive Miniatures Nebelwerfer
 

A Storch and a Stuka

A Storch and a Stuka

It has been a long time, but I have started to start posting again. We have been involved in a quite heavy car crash late last year and I had decided to spend more time playing and less time posting.

Now Corona has changed that. Suffering from asthma, I guess I will have to limit social contacts to a minimum in coming weeks and months, so I decided to return to my blogging (and maybe rekindle my interest in blogging). Not sure how frequent things will be.

There are a lot of minis I painted in recent months, but I am not sure how much will follow in the near future, since I am one of the lucky few to work through the crisis.

Anyway… let’s start with two models I finished this weekend. These are two 1:48th scale planes for WWII. Both are very old kits… one just slightly 1 ½ years younger than myself.

Up first is the older one, a Fieseler Storch from Revell. For a kit from the late 70´s the quality was pretty good and the decals were almost as good as new. Given that the offering from Tamiya, which was released just a few years ago, costs around 60 Euros, this was a very good alternative.

The connection between the fuselage and the wings was a bit wobbly, but once the support struts were glued on, the plane itself became surprisingly stable.

Now this plane will have to serve in many lists both from early to late war. So I chose colours for the camouflage that were used for most of the war from roughly 1941 to 1944 (and since not all planes were repainted possibly till 1945) to give me the most mileage. For the same reason the areas painted yellow for recognition were kept to a medium level with just the undersides of the wingtips and a band around the fuselage.

The other model is a Stuka by Monogram. Slightly younger than the Storch. The model itself was nearly as good as the Storch, but the decals were a pain in the behind, with the glue being quite slimey and them requiring a lot of Micro Set and Micro Sol to work.

This one is supposed to be used for the very early period. From Poland to Barbarossa, possibly even longer. I went for the same colours as I did with the Storch. These will not work for Poland or France, but should be fine Greece or Barbarossa, which will see nearly as many games.

In this case I went for quite large yellow areas, since this plane will mostly see use during periods when the Germans had air superiority.

Both planes were weathered with oil paints. I replaced the propellers with clear discs made from blister packing (although I might replace the one on the Storch with which I am not entirely happy) and added aluminium pipes into their fuselages, so I can mount them on my homemade flight stands.