Last Wednesday we played our second game of SAGA, again at Martins place. As you know I was able to finish my remaining minis in time, so we both played with our own minis this time. Both Warbands were the same as last time:
Martin played Normans. A mounted Warlord, three units of mounted knights (Hearthguard), two units of Sergeants (Warriors), one of them armed with crossbows and one unit of bow armed Peasants (Levies). Again Martin would divide his Peasants into two units.
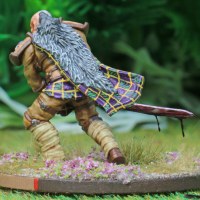
I had my Warlord, Jarl Sigvaldi and his Jomsvikings (Hearthguard / Mercenaries), one unit of Berserkers (Hearthguard), two units of Hirdmen (Hearthguard) and one unit of Bondi (Warriors). Just like last time I would amalgamate both Hirdmen units into one large unit.
We played the #Battle at the ford” scenario. So we both had to have as many minis as possible on the opponents side of the river that cut the table in half by the end of the game (=end of turn seven).
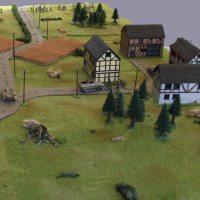
Seen from the Viking side the table looked like this. On my right corner there was a Viking village with five houses, all behind a palisade and a slight hill. There were a large hill in the left corner and a small wood near the ford. As I said, the table was cut in half by a small river. It was impassable except for the ford in the middle of the table and a small bridge in front of the Viking village. There was a larger wood and some hedges on the left, a small hill in the middle and a field to the right, all on the far side of the river.

Deployment seen from Viking right

Deployment seen from Norman left
I deployed my Jomsviking mercenaries and Bondi on my right ready to take the bridge. On the road leading up to the ford were my Berserkers, Warlord and large unit of Hirdmen. Since three of Martins units and his Warlord were mounted, I expected them to make a rush for the ford,trying to get to the other side before I could seal it off. So I deployed my Jomsvikings and Berserkers to the front of their clusters, being the most capable on the offensive.
")
Jomsvikings and Bondi at the beginning of the game (right flank)
Martins Normans formed a long line. From (his) left to right there were the Sergeants, a unit of mounted Knights, the Sergeants with crossbows, his bow armed Peasants, two more units of mounted Knights with his Warlord and the other unit of bow armed Peasants.

Norman deployment
I won initiative and the first two rounds were spend moving our units forward.

Jomsvikings and Bondi advancing on the bridge

Normans advancing on the bridge
On the third round my Vikings advanced further still, but did not reach either the ford or bridge. But they were now in range of the Normand archers and crossbows. At the ford the Berserkers became the target of the Peasant archers, one of them being struck down. On the other flanks the crossbows wanted to fire at the Jomsvikings, but the gods prevented that (I love the Loki ability). They were activated once more earning them a fatigue marker and were able to fire this time, killing one of the Jomsvikings. But the knights made no real moves towards the crossings.

Beginning of round three seen from the Norman side
At the beginning of the next round the Normans were still out of reach for me, but I was able to move my units onto the bridge and into the ford, effectively sealing both off. Things did not look like I would be charged at the ford and the Normans seemed contend to just fire arrows at me over there. So the Hirdsmen and Warlord overtook the Berserkers. With their heavier armour they would be able to weather the storm of arrows far better. Which they did not loosing a single fighter to missiles till the end of the game.

Viking main body advancing on the ford
(This photo was taken a little earlier since all the Berserkers are still alive.)
The other flank saw more crossbow fire on my Jomsvikings. They were already fired up on their abilities in preparation of the fight to come and suffered no more losses. But then the were charged by the Norman knights. The fight was ferocious with the Normans getting help from the dice on the battleboard. But it was to no avail. Two knights died and the Jomsvikings just stood there on the bridge, not suffering any losses.

Viking blocking position
Since the Normans at the ford were still too far out for an effective charge and I did not want to blow my units on some lowly Levies, I decided to sit it out at the ford and assigned most of my SAGA dice to the units at the bridge, only reserving some to make them stronger vs. missile attacks.
So almost everything went into the other flank. My Jomsvikings charged the crossbows, killing 5 Sergeants at no loss of their own. Bondi were too far out for an attack and only moved to the far side of the bridge to seal it off.

Hold the bridge
The Bondi were then charged by the Sergeants. I suffered two killed and my Bondi were driven back onto the bridge. The knights took no part in the fighting there. The crossbows tried their luck on the Jomsvikings again, but were too few and even making use of my two fatigue counters killed none of my Mercenaries.
By the ford the Norman Warlord was still happy just firing at my Vikings, but with a little help of Asgard, failed to make an impression. Some of the Norman knights even drew back. ![]()

Norman knights and warlord

Normans about to charge at the ford… or so it seems
Since the Normans had even pulled back by the Ford I now concentrated all my efforts (and SAGA dice) on the bridge. Now it was time for payback, Bondi style. They charged the Sergeants and locked them in two rounds of combat, killing three of them at the loss of only one and driving them back. The Jomsvikings turned away from the Crossbows and charged the remaining two Knights killing them at no loss.

Fighting it out at the bridge
Now the Normans finally began to move into position for an attack at the ford. And charge they did. First came the Norman Warlord accompanied by a unit of knights. Both sides made use of SAGA dice and in the end three Vikings died in the charge, but so did all four Knights, forcing the Warlord to withdraw.

Finally some fighting at the ford
Forward charged another unit of Knights. All splendid in their shiny chainmail, with banners flapping. But only one of them was able to leave alive and they had only killed two more Hirdmen. The Norman force at the ford was spend. Only the Warlord, a Knight and two six-men units of Peasant archer remained. No match for a Viking Warlord, three Hirdmen and three Berserkers.
On the other flank the there was some preparatory fire from the crossbows on the Jomsvikings, but again they failed to make an impression. Then the Sergeants charged the mercenaries, but only suffered losses and no gains. So by the bridge it was only three crossbows and three Sergeants versus three Bondi and three Jomsvikings. So they too had little hope of driving the Vikings back, much less making it to the other side.
With all the Vikings on the Norman side of the river and a force too spend to drive them back, the Normans called it a day early and withdrew.

Final charge of the Sergeants
All in all it was a good game. This time the Jomsvikings did not fail me, but they did so in a scary way. The worst I ever rolled when it came to their abilities was a nine, so they were always high on abilities. All in all they might even have been able to hold the right flank on their own. They were so powerful, that they distorted the game to a certain degree. The next one or two battles will show if they are so much of a force that they distort the game. If they are, I think I will only use them as normal Vikings to keep the game fun!


Fireymonkeyboy
May 19, 2012 at 13:37
That table looks fantastic!
LikeLike
Monty
May 19, 2012 at 14:51
A visual treat! Someone spent as much time on the terrain and table as painting up an army. All of that work pays off handsomely.
LikeLike
Burkhard
May 19, 2012 at 15:38
Thank you guys! I guess Martin will be more then happy, you liked his terrain (it is great by all means)!
LikeLike
Thomas
May 20, 2012 at 16:47
Wow, great miniatures, great table, great game!
LikeLike
Joe Schulze
May 22, 2012 at 01:18
After reading your posts I am really tempted to buy Saga….great stuff Burkhard.
LikeLike
Wargamerabbit
May 22, 2012 at 03:04
Excellent!. Makes me take a look at the SAGA game when I hopefully start some Dark ages next year….sort of a long term project. Great terrain and table. Made the game real “wet eye” candy for this rabbit.
Reading your posts as they come across the wire…. Michael aka WR
LikeLike
Burkhard
May 22, 2012 at 07:01
Again, thanks a lot all of you.
I think the biggest beauty about SAGA is how few minis you actually need. I have always liked medival / dark ages settings, but could never see myself painting the numbers of minis required. With this game you need very few (in my case just 25 minis for a very playable Warband), which solved that problem for me.
LikeLike